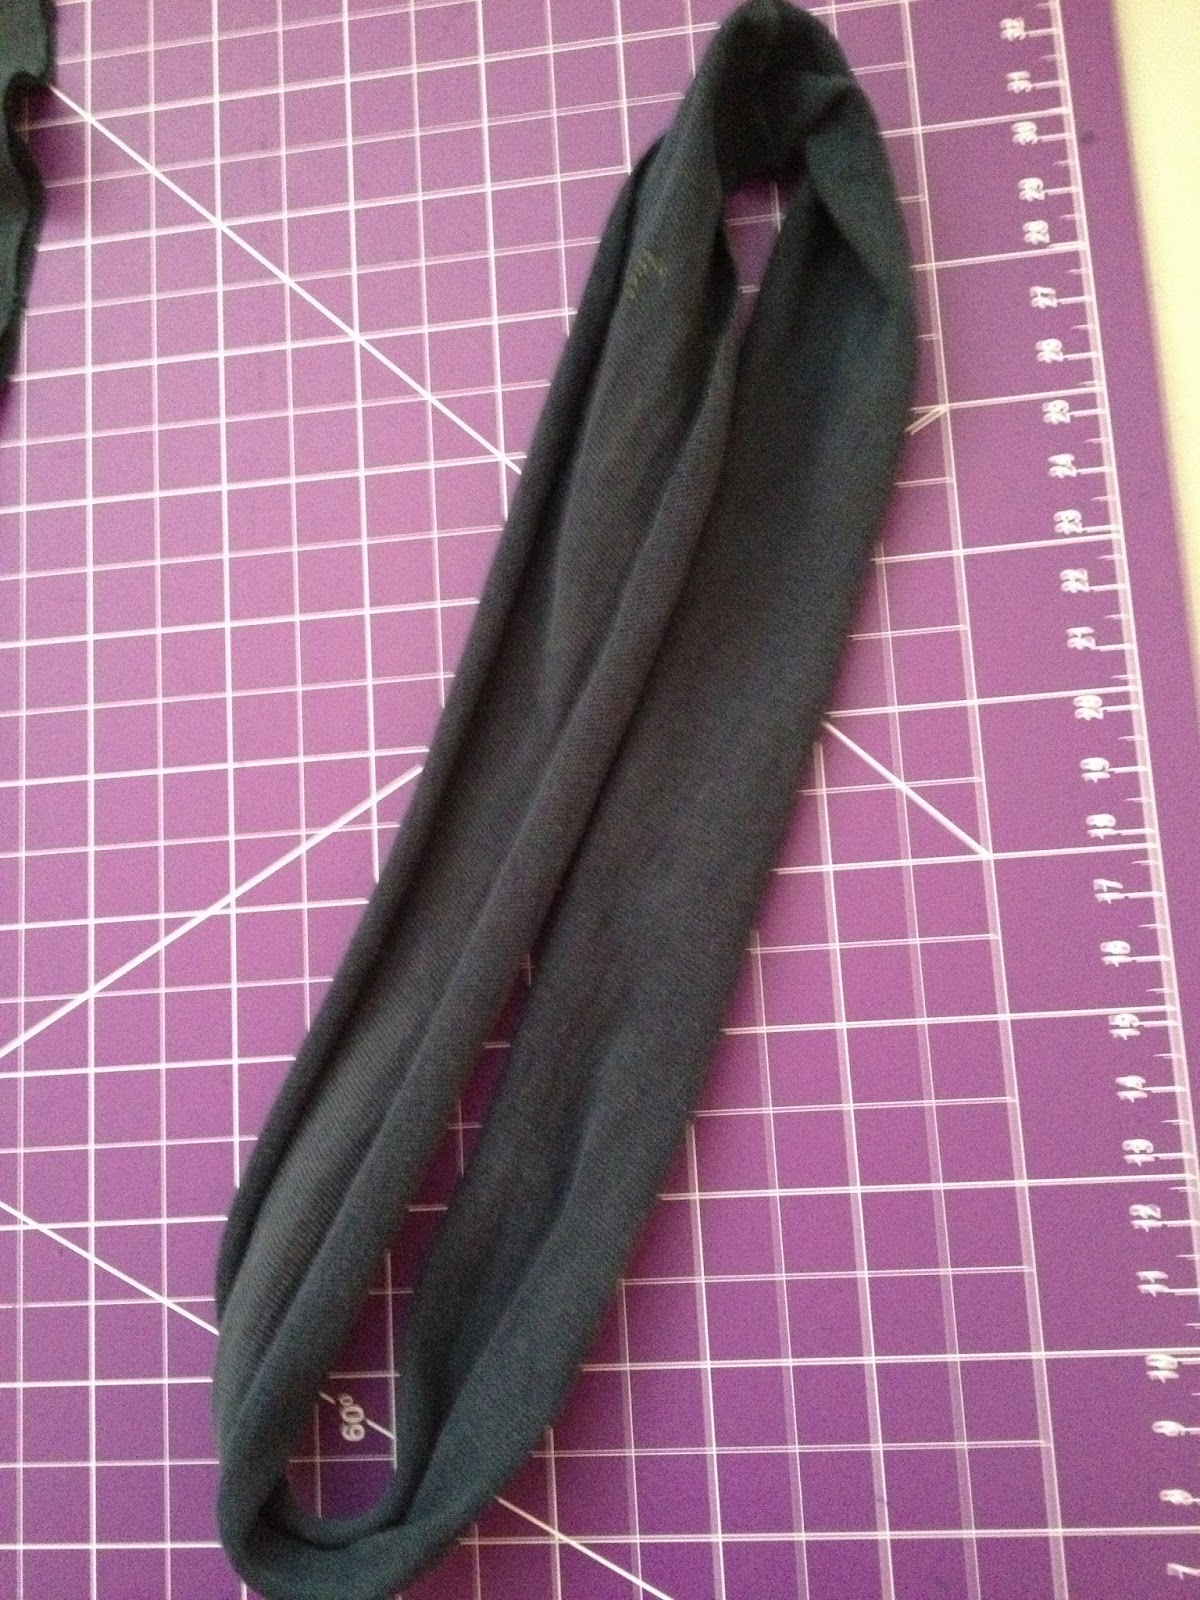
This is one of the simplest projects I have done yet :) Yet they look great! Thanx to the amazing selection of very affordable fabric at Fabricland!
Step 1: I wrapped the fabric around my leg deciding how high I wanted them to be with seam allowance on either side.
Step 2: Sew the long edges together. I recommend surging or zigzag stitch.
Step 3: Sew the top. Fold the top over an inch or an inch and a half depending on your preference. Sew.
Step 4: Sew the bottom. Fold the top over 1/2inch and sew.
Step 5: Hand sew buttons where you like them. I put the long seam to the back so its not noticeable, put it on my leg and decided where I wanted the buttons to go. I think the double buttons look a little better :)
Happy Sewing!
Showing posts with label clothing. Show all posts
Wednesday, February 6, 2013
Thursday, December 6, 2012
Homemade Laundry Detergent
We go through laundry detergent like its going out of style.
We are out again, today, and I couldn't bring myself to buy a bottle of overly smelly detergent that costs $12 every time...
We have tried quite a few different types. At first it was the ones on sale. Then I learnt about all the toxic crap that is in the regular brands. So we tried a couple more natural ones. But they are even more expensive and some are not telling the complete truth about the bad chemicals. Just because it says natural does not mean it is!
Sooo off to Google I searched and searched. I remember bookmarking natural DIY laundry detergents a couple months ago waiting for the day that ours ran out. Hmm... Most of the detergents have Borax in them... That doesn't sound very healthy does it?? Natural of less evils? Maybe...
Grist Explains it here.
Anywhoooo I decided to go Borax free! Here is the recipe.
DIY HOMEMADE LAUNDRY DETERGENT
3 cups Baking Soda $3.25 (for a GIANT container!)
3 cups Washing Soda $6.59 (I used 1/8 of it)
1.5 bars Dr. Bonner's Castile Soap (peppermint scent) $2.67 each
Off to the store I went for my real natural products.
I walked down the laundry detergent isle today looking for washing soda and Castile soap and had to breath shallowly... There are sooo many smells that are supposed to be "fresh" in the laundry detergent section. There are soo many harmful chemicals in the fabric softeners that get used every day not to mention its toxic to our environment. Don't use them!
I found both of them at London Drugs and always have a giant container of baking soda at home for all my cleaning and baking needs :-)
After mixing up a batch I gotta say I was dieing to try it out! Its in a sealable container that has a 1/8 cup scoop sitting in it just waiting to be used. I put smelly cloths that I cleaned up my pups pee with... I know... Gross! Grass stained and mudded up jeans and some other randoms. I washed on cold as normal (energy saving of course), put in 1/8 cup vinegar into the fabric softener section (as normal) and let my HE machine do its thing! I opened the door to clean smelling clothes. No abnormal smell of perfume, just clean smelling clothing! Oooohhhhh Happy Days!
Plus with this amount of detergent it should last our family of three 10 months!
Did you read these things?!?!
Its Cheap!
Its Healthy!
Its Natural!
Its Environmentally friendly!
It's MUCH Easier then you think to make!
Happy Natural DIY Living!
We are out again, today, and I couldn't bring myself to buy a bottle of overly smelly detergent that costs $12 every time...
We have tried quite a few different types. At first it was the ones on sale. Then I learnt about all the toxic crap that is in the regular brands. So we tried a couple more natural ones. But they are even more expensive and some are not telling the complete truth about the bad chemicals. Just because it says natural does not mean it is!
Sooo off to Google I searched and searched. I remember bookmarking natural DIY laundry detergents a couple months ago waiting for the day that ours ran out. Hmm... Most of the detergents have Borax in them... That doesn't sound very healthy does it?? Natural of less evils? Maybe...
Grist Explains it here.
Anywhoooo I decided to go Borax free! Here is the recipe.
DIY HOMEMADE LAUNDRY DETERGENT
3 cups Baking Soda $3.25 (for a GIANT container!)
3 cups Washing Soda $6.59 (I used 1/8 of it)
1.5 bars Dr. Bonner's Castile Soap (peppermint scent) $2.67 each
Off to the store I went for my real natural products.
I walked down the laundry detergent isle today looking for washing soda and Castile soap and had to breath shallowly... There are sooo many smells that are supposed to be "fresh" in the laundry detergent section. There are soo many harmful chemicals in the fabric softeners that get used every day not to mention its toxic to our environment. Don't use them!
I found both of them at London Drugs and always have a giant container of baking soda at home for all my cleaning and baking needs :-)
After mixing up a batch I gotta say I was dieing to try it out! Its in a sealable container that has a 1/8 cup scoop sitting in it just waiting to be used. I put smelly cloths that I cleaned up my pups pee with... I know... Gross! Grass stained and mudded up jeans and some other randoms. I washed on cold as normal (energy saving of course), put in 1/8 cup vinegar into the fabric softener section (as normal) and let my HE machine do its thing! I opened the door to clean smelling clothes. No abnormal smell of perfume, just clean smelling clothing! Oooohhhhh Happy Days!
Plus with this amount of detergent it should last our family of three 10 months!
Did you read these things?!?!
Its Cheap!
Its Healthy!
Its Natural!
Its Environmentally friendly!
It's MUCH Easier then you think to make!
Happy Natural DIY Living!
Labels:
baking soda,
chemical-free,
chemicals,
cleaning,
clothing,
DIY,
healthy,
homemade,
natural,
thrifty,
vinegar
Sunday, October 28, 2012
Little Girls First Book Bag
Thats right, our 7 year old asked for a book bag! Not a backpack because aren't cool anymore?
Yikes.
So I asked what she was going to use her book bag for. She has a journal she writes in every day. She writes about her day, her favourite things that happened during the day, what she is thankful for from that day and what she wants to do for tomorrow.
Anyways... this bag needed to be cute, have pink (of course) and have a shoulder strap that can be adjustable.
My solution? My giant pyjama pants that were not being used! This is a great beginners project! Upycling AND FREE!
Whoops, took a picture after it was cut... I used the leg of the jammers with the hem being the top of the bag. I sewed the bottom of the bag together creating a rectangle with one open edge.
I then matched up the seams on each bottom corner of the bag and sewed right across giving the bag a little more base.
Finally I sewed 2 rings to either side of the bag and attached a strap like with an adjuster so she can either put it over one shoulder or over her head.
Her journal fits perfectly! She loves her new heart book bag :) I might make a bag for myself.
Happy sewing!
Yikes.
So I asked what she was going to use her book bag for. She has a journal she writes in every day. She writes about her day, her favourite things that happened during the day, what she is thankful for from that day and what she wants to do for tomorrow.
Anyways... this bag needed to be cute, have pink (of course) and have a shoulder strap that can be adjustable.
My solution? My giant pyjama pants that were not being used! This is a great beginners project! Upycling AND FREE!
Whoops, took a picture after it was cut... I used the leg of the jammers with the hem being the top of the bag. I sewed the bottom of the bag together creating a rectangle with one open edge.
I then matched up the seams on each bottom corner of the bag and sewed right across giving the bag a little more base.
Finally I sewed 2 rings to either side of the bag and attached a strap like with an adjuster so she can either put it over one shoulder or over her head.
Her journal fits perfectly! She loves her new heart book bag :) I might make a bag for myself.
Happy sewing!
Wednesday, October 24, 2012
Girls leggings from moms stretchy pants
Another DIY thrifty project! Sewing and most importantly Upcycling! I just saved myself $20! Which is not much... but if you keep adding that $20 over and over again it adds up... right? My little cookie is not much of a jeans wearer... When she picks out her clothing the bottom part is always leggings! Did you know even at Walmart little girl leggings are $10! Common! Its the tiniest bit of fabric... how can it be that much? I can buy a meter of fabric for $2!... Wait, thats not a bad idea...
I went to the mall and they have adult leggings in every colour you could imagine on sale! Ahem, Urban Planet, Thank you! They were $2 each! So I purchased... a few...
Not for me of course... well except the black ones... and the brown ones... and the grey ones... but the other colours were for another project...
Project leggings for our little cookie!
She is a size 6-7ish depending on the store, but 7 years old.
I found the tutorial here.
I laid down her own leggings (that fit her) folded one leg into the other onto the newly purchased leggings and cut around them leaving 1/4 inch for sewing. I made 2 sets of little girl leggings from each pair of purchased pants! That means I spent $1 on her leggings. To top it off I unpicked the waistband from the purchased leggings and sewed them right into her new ones! I have also made her leggings out of stretchy pants that don't fit me anymore. Yes, that means FREE
Now when I ask her to get dressed in the morning, the first thing she pulls out is her NEW leggings! She now coordinates her shirts to match them too! Kids love handmade things from their parents! Try it out! You can't go wrong with this project!
Happy sewing and up cycling
I went to the mall and they have adult leggings in every colour you could imagine on sale! Ahem, Urban Planet, Thank you! They were $2 each! So I purchased... a few...
Not for me of course... well except the black ones... and the brown ones... and the grey ones... but the other colours were for another project...
Project leggings for our little cookie!
She is a size 6-7ish depending on the store, but 7 years old.
I found the tutorial here.
I laid down her own leggings (that fit her) folded one leg into the other onto the newly purchased leggings and cut around them leaving 1/4 inch for sewing. I made 2 sets of little girl leggings from each pair of purchased pants! That means I spent $1 on her leggings. To top it off I unpicked the waistband from the purchased leggings and sewed them right into her new ones! I have also made her leggings out of stretchy pants that don't fit me anymore. Yes, that means FREE
Now when I ask her to get dressed in the morning, the first thing she pulls out is her NEW leggings! She now coordinates her shirts to match them too! Kids love handmade things from their parents! Try it out! You can't go wrong with this project!
Happy sewing and up cycling
Friday, October 19, 2012
Upcycle? T-shirt to Workout top!
Yeah upcycling!!!!
This is a new term I have only learned a month ago. I know, shocking! I have been upcycling everything in our home thanks to Pinterest! I mean I upcycle things like containers for other packaging leftovers for family members to take home and stuff, but there is a whole world of upcycling out there that I didn't know evern existed!
Upcycling is defined as the process of converting waste materials or useless products into new materials or products of better quality or for better environmental value.
I upcycled a workout top from my mans t-shirt. I am just soo proud right now.
You can get the tutorial here. The only thing I didn't do was cut the bottom. I think it looks weird... Otherwise best clothing upcycle I have done yet. Its fitted, but still loose and just awesome!
Then cut 3 strips about this width (2inches) from the leftover sleeve to tie the back piece together
And Ta-da you have your very own workout top from a unused t-shirt!
Happy upcycling!
This is a new term I have only learned a month ago. I know, shocking! I have been upcycling everything in our home thanks to Pinterest! I mean I upcycle things like containers for other packaging leftovers for family members to take home and stuff, but there is a whole world of upcycling out there that I didn't know evern existed!
Upcycling is defined as the process of converting waste materials or useless products into new materials or products of better quality or for better environmental value.
I upcycled a workout top from my mans t-shirt. I am just soo proud right now.
You can get the tutorial here. The only thing I didn't do was cut the bottom. I think it looks weird... Otherwise best clothing upcycle I have done yet. Its fitted, but still loose and just awesome!
First, you cut following the seams of the sleeves and neckline.
Stretch it out by just pulling on it!
You wrap the fabric around the back to bring it together which creates the workout top look!
And Ta-da you have your very own workout top from a unused t-shirt!
Happy upcycling!
Wednesday, October 17, 2012
How to cover up holes in leggings
Have a hole in an adorable piece of clothing? Patch it!
Children get holes in their pants. They play on the playground, kneel in dirt, drag their legs on the floor and soooo much more!
I have a very thrifty idea to cover up the holes in leggings that is such a cute idea, plus your little girl will love the new design!
She only had one hole in one of the legs, but it looked funny just adding a patch of fabric to one leg... Can you guess which one? Haha the knee of course!
I cut out her favourite shape (heart) out of plain fabric I had just lying around. I pulled out the ol' hand needle and thread (doubled the thread to add thickness). I started from inside the pant leg and just went around the heart. Piece of cake? Piece of pie!
Yay for simple fixes and DIY for newbies!
Children get holes in their pants. They play on the playground, kneel in dirt, drag their legs on the floor and soooo much more!
I have a very thrifty idea to cover up the holes in leggings that is such a cute idea, plus your little girl will love the new design!
She only had one hole in one of the legs, but it looked funny just adding a patch of fabric to one leg... Can you guess which one? Haha the knee of course!
I cut out her favourite shape (heart) out of plain fabric I had just lying around. I pulled out the ol' hand needle and thread (doubled the thread to add thickness). I started from inside the pant leg and just went around the heart. Piece of cake? Piece of pie!
Yay for simple fixes and DIY for newbies!
Saturday, October 13, 2012
How to make a maxi skirt in 2 hours
Lately I have been going through this sewing frenzy... I want to sew everything, until I remember I am a beginner and should take things slowly... Slowly Jessica, Common!
I saw soo many women in these maxi skirts that I think look good on some people and not so good on others. I thought I would be in the 'other' group. So I never even tried one on at the stores as they were much to long and I did not own a sewing machine and didn't want to take it to get hemmed. Sooo that is my excuse and I'm sticking to it!
Anyways, I decided to make one using this and this tutorial.
(In the corner is my little pups ears.)
I found a pretty stretchy fabric at Fabricland for a whopping $2 for 2 meters! that I was a little worried about but couldn't help but buy it as it was sooo soft and silky! It isn't as hard as I thought it was going to be working with such a stretchy fabric. If I don't have to worry neither do you! This is a perfect beginners project!
I loved it so much and the little cookie loved it so much I decided to make 2! One for her one for me :) I bought too much fabric (you only need 1 meter if your about a size 5 women's) She is 7 and I still had sooooo much left over fabric! I wonder what else I can use this silky soft fabric for? Any ideas?
You can see I used the yoga band style for my little cookies dress and the 3 inch elastic waistband for me. For my future maxi skirts I will be making the yoga band waistband its sooooo comfy!!!
Happy sewing friends!
I saw soo many women in these maxi skirts that I think look good on some people and not so good on others. I thought I would be in the 'other' group. So I never even tried one on at the stores as they were much to long and I did not own a sewing machine and didn't want to take it to get hemmed. Sooo that is my excuse and I'm sticking to it!
Anyways, I decided to make one using this and this tutorial.
(In the corner is my little pups ears.)
I found a pretty stretchy fabric at Fabricland for a whopping $2 for 2 meters! that I was a little worried about but couldn't help but buy it as it was sooo soft and silky! It isn't as hard as I thought it was going to be working with such a stretchy fabric. If I don't have to worry neither do you! This is a perfect beginners project!
I loved it so much and the little cookie loved it so much I decided to make 2! One for her one for me :) I bought too much fabric (you only need 1 meter if your about a size 5 women's) She is 7 and I still had sooooo much left over fabric! I wonder what else I can use this silky soft fabric for? Any ideas?
You can see I used the yoga band style for my little cookies dress and the 3 inch elastic waistband for me. For my future maxi skirts I will be making the yoga band waistband its sooooo comfy!!!
Happy sewing friends!
Friday, October 12, 2012
Beautifying little girls clothing
I hate it when tops get too short! I am sooo happy that long tops are the cool thing right now because I do not like belly tops. Not at all! Not for older people, not for children and ESPECIALLY not for men... (not that this is a problem...)
Recently I have noticed some of my little cookies tops have been getting a little on the short side and instead of getting rid of them (they fit everywhere else on her) I decided to do a little makeover! Her tops are so cute and almost new so why not add some length? This is a double bonus in my opinion as she prefers long tops and tights. She is definitely NOT a jeans girl!
I didn't follow any of the measurements that were suggested, just measured the shirt and her to see how far I wanted the ruffles to go.
I got the tutorial from here.
We have a HUGE stash of tights that I have made for her (for another post) and these long tops will be perfect to mix with!
She is one happy little girl in her brand new shirt!
Subscribe to:
Posts (Atom)